How do I prep the files?
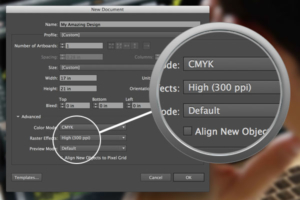
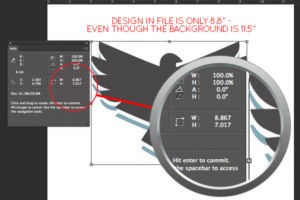
All Files must be 300 DPI or a Vector File. Preferred file types are .PSD, .TIF, .EPS, .AI, .PDF, and .JPG. Design should be sized to print. Orders cannot be started until we have usable artwork.
How much are the setup fees (aka screen fees)?
Screens are $25 per color, per location!
What is your turnaround time?
Typical turnaround time is 7-10 business days + shipping time. Turnaround time is only an estimate, is not guaranteed and starts when your order is paid for AND we have all information to complete your job. Complex designs or orders with extra add-ons may increase turnaround time. Allow for at least 3 additional days for interior printed tags.
If you have a deadline for your order, you must let us know when placing your order and a rush fee may imply.
Taking longer than 24 hours to approve your digital proofs may delay your order. Any circumstances out of Embroico’s control (ie: weather delays, shipping errors by the supplier, etc.) may also require more time and are not factored into the initial turn around time estimate.
Do you have a minimum?
We will do an order as small as 12 shirts per design but there will be some restrictions on size and number of colors.
Can I mix and match shirt & ink colors?
Yes! As long as imprint colors and Art stays the same.
If imprint colors change, there will be an additional fee(s)
Can I mix shirt sizes & do I need to order in dozens?
You can order as many different shirt sizes as you want and you DON’T have to order in dozens, unless otherwise stated. Certain brands require ordering in half dozens.
I’m missing a few shirts, what happened?
All orders can have up to 2% under run. Some shirts could be damaged during printing. Because of this, we cannot guarantee that you will receive 100% of the garments in your order. We strongly recommend ordering a few extras to account for this possibility. We always strive to give you everything you ordered, however, if there is a shortage with your order, we will refund or credit you for the difference.
Can you do (insert crazy idea here)?
Maybe. Why don’t you drop us an email and we’ll see what we can do!
File Prep
Learn how to prepare an image for screen printing and other t-shirt design specifications at Embroico.com. Get your art files ready, size your design and use our templates here! Feel free to contact us if you still have questions.
Prepare Your Art
All files must be at least 300 ppi or Vector Format. If your file is not 300 ppi, you cannot just increase the resolution of the file. This is called “upsampling” and will result in a blurry image. If you are creating your file in Adobe Illustrator or another Vector-based software, just size your image to the size you want it to print.
Accepted File Types
We accept the following File Types:
- Illustrator (.AI)
- Vector (.EPS)
- Photoshop (.PSD)
- PDF (universal vector file format)
- JPEG
- TIFF
We prefer .AI or .EPS files first because Vector images can be scaled without affecting quality. We prefer .PSD or .PDF second & .JPG or .TIFF last.
“What’s a vector file?”
A vector file is a scalable art format that is most commonly associated with Adobe Illustrator. It’s a file that can be sized small enough to print on a baby onesie or large enough to fit on a billboard without any degradation or loss of clarity. It’s the favored file format of screen printers because it can be easily resized should the artwork require it.
“What does ‘high resolution artwork’ mean?”
It means that when zoomed in at 100% on an image, it has well defined, crisp lines. The two images below help illustrate that. On the top you see two seemingly identical images, but when you zoom in on the two images you’ll see the contrast between the two. The left image is muddy and not well defined. The image on the right, however, is clean without any blurriness or distortion.
In order for a design to be printable it absolutely has to have sharp, clean edges. If it is even a little blurry the screen that the image is burned onto won’t pick up on the fine details and the final product won’t look right.
All vector artwork is high resolution, which we covered. But let’s say you created your artwork in Photoshop, Gimp or another design program. What then? What steps can you take to prevent your artwork created in those programs from being unusable?
- Design everything in 300dpi. Dots Per Inch, or dpi, is literally a measurement of how many dots of color are in every square inch of a design. It’s the industry standard for almost any kind of graphic art as it produces a very crisp edge and is easily translated to print.
- Create your project at the desired size you want it printed. When creating a new photoshop document with the intention of designing a new shirt, always favor a larger canvas than a small one. You can always shrink it down to work on the garment but you can’t ever stretch it out to make it larger without pixelating the artwork.
These rules definitely are not common practice for even graphic designers, but when dealing with screen printing they make all the difference. Taking these steps will help to not only make your artwork printable, but the best quality you can get. They will make everybody’s job easier and guarantee the best final product!
Convert Your Text to Outlines
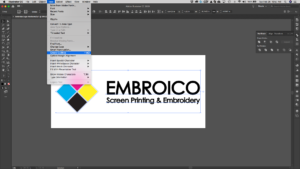
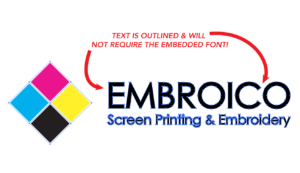
If you are creating your file in Adobe Illustrator, you will need to choose “Create Outlines” function on all your text. This allows us to open the file without requiring the font. See the image below for a quick example how to do this.
*Half Tones: Please allow us to halftone the images for you. If we do not control the halftones, we cannot guarantee the quality of the print. We do understand that some designs are complex and will require separation fees, as a client you may be inclined to try to separate or halftone the image yourself to try to keep your cost as low as possible. Unfortunately this does not work. Our computers in the art department are calibrated to set the halftones specifically for the films and screens that we use for printing. Often times if you try to separate or halftone the image yourself it may cause more art charges than you would have originally incurred.

